How to Make Hash: The Complete Guide

Originating centuries ago in the Far East, cannabis hashish has a rich history of cultivation for medicinal, spiritual, and recreational purposes. As awareness spread throughout the globe by way of trade, exploration, and war, the popularity of hash grew right along with it.

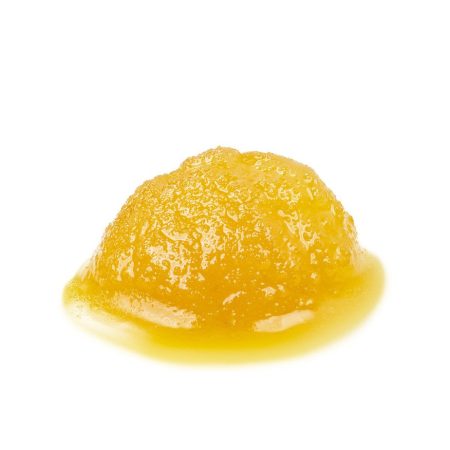
A cannabis concentrate, hash is the collected trichomes, or small stalk-like “hairs” from the surface of the flower, separated, dried, and pressed into small bricks or rolled into balls. Originally consumed by oral ingestion, the final product can be smoked or vaped. Due to the relatively low flammability of hash, though, it is often mixed into a bowl or sprinkled on top of joints using cannabis, tobacco, or both.

Hand-extracted Charas

One of the oldest, simplest, and least technologically advanced methods of making hash is what the people of Nepal and India call “charas.”  

According to the Hindu religion, the god Shiva is known for his love of cannabis. Charas are often incorporated into their celebration of the festival of Holi.

What you’ll need:

  • Fresh cannabis flower, ideally picked straight from the plant. Trim excess leaves, but leave a bit of the stem.
  • Your own two hands, thoroughly washed, of course. Be sure to use the purest available soap and avoid any that contain perfumes or lotions.

Steps:

  1. Place a cannabis bud between the palms of your hand and begin to roll it in a slow, circular motion. Not too much pressure, not too much speed. You want to get as little plant matter as possible to come off in the process. Remember, the faster you go, the more resin will be lost, so take it easy.
  2. You should start to see a thick resin form on the palm of your hands as the flower releases the oils and THC. This is the charas. When enough forms, scrape it off your palm, set it aside, and continue with the next flower.
  3. Once a substantial amount is collected, you can roll it into a ball or shape it into a block.

It should be noted that while this is the easiest way to make hash at home, it is also one of the most tedious. Also, it generally produces the lowest yield of concentrate when compared with other methods. At the same time, it’s very organic, requires no utensils, and can be a fun social event if you have a few friends and a lot of flowers to roll!

Dry Sift

Dry Sift

Another easy method is to dry sift your cannabis. This process involves removing the trichomes by passing them through a fine sieve or strainer. Freezing your flower the night before makes it easier for the trichomes to separate and fall.  

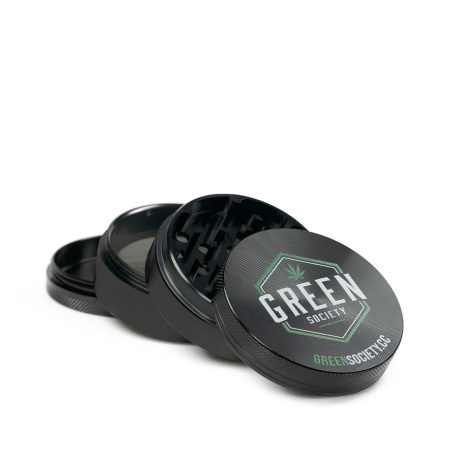
Dry sifting is also achieved if you use a three-stage herb grinder. The hash collects in the bottom or final stage of your grinder below the wire mesh and can be scraped and collected for pressing. This is not a high-volume method as you usually grind one or two buds at a time, but it incorporates the same idea.

What you’ll need:

  • Trimmed cannabis 
  • A sieve, silkscreen, or strainer with very fine openings
  • Parchment paper
  • A plastic card or scraper

Steps:

  1. Roll out a section of parchment paper and lay it on a clean, flat surface. Be sure the parchment is cut to be larger than the widest part of the sieve or silkscreen.
  2. Hold the sieve above the parchment paper and place your cannabis flower in.
  3. Gently begin rolling and moving the flower around the bottom of the sieve, allowing the trichomes to separate and drop through the fabric or wire mesh.
  4. Fine dust should begin forming on the parchment paper.
  5. Continue gently rolling and adding cannabis to the sifting device and, when enough dust has appeared on the parchment, scrape it together with a plastic card and press it into a block.

This method should yield kief in about a 10 to 1 ratio to your original plant matter. This means, if you start with 10 g of flower, you can expect 1 or 2 g of kief to press.  

Making Rosin Hash With a Flattening Iron

Making Rosin Hash With a Flattening Iron

This is another process that involves a few items you may already have in your home. It’s very easy and quickly creates cannabis concentrate for you to enjoy.

What you’ll need:

  • Cannabis flower
  • Flat iron or hair straightener. One with fine temperature control is ideal, but if you’re careful, any similar tool you may have will do
  • Parchment or baking paper

Steps:

  1. Separate the flower into small portions about the size of your fingertip
  2. Cut the parchment paper into smallish pieces and fold in half. If your particular parchment paper has a shiny side, fold so that side is facing inward
  3. Place the individual flower into one of the folded pieces of parchment paper.  
  4. Taking the flat iron, press the cannabis in between the hot plates for approximately 5 seconds.
  5. Unfold the paper and collect any golden resin that was pressed out of the flower. It is possible to re-press the same bud a few times to fully extract the hash rosin.
Bubble Hash

Bubble Hash

Making bubble hash, or ice hash is a process that takes a little more attention, a bit more time, and a few more specialized utensils. However, the yields are impressive, and you’ll end up with a couple of different grades of hash.  

What you’ll be doing is agitating your cannabis in an ice bath and straining off the trichomes with filter bags of varying micron openings. The ice-cold water will make the trichomes brittle and break off more easily for harvest. The equipment used for this part of the process is up to your preferred level of investment. While hand-mixing with a long-handled rubber spatula or wooden spoon is fine and very inexpensive, you can also choose to use a cake mixer with beaters attached, a power drill with a paint-mixer attachment, or drop a little extra coin on a portable, compact washing machine.

What you’ll need:

  • Ice
  • Water
  • Two buckets
  • Cannabis flower
  • Bubble bags (also listed as press screen bags or rosin filter bags) in 220, 160, 73, and 25-micron sizes
  • A 25-micron pressing screen for drying
  • Metal spoon or scraper
  • A clean spray bottle or sink sprayer
  • Equipment for your chosen agitation method

The following instructions are for manually agitating your cannabis flower with a mixer or spoon:

Steps:

  1. Secure your 220-micron bag into one of the two buckets.
  2. Layer the bottom of the bag with ice, then add a layer of flower, then ice, then flower, followed by a final layer of ice.
  3. Add enough water to cover the cannabis and float the ice on the surface.
  4. Let chill for 20 minutes. This will make the trichomes attached to the buds nice and brittle.
  5. Use your long-handled spoon, hand mixer, or paint stirrer set on low to slowly mix up the ice, water, and flower. Don’t go too fast! The last thing you want to end up with is a ganja smoothie. You just want the cold trichomes to fall off into the water. If using a hand mixer, it’s a good idea to pause every once in a while to give the bottom of the bucket a good stir to move the buds stuck lower in the bucket up and around a bit.
  6. Stop and let sit for 10 minutes or so to let the trichomes settle toward the bottom of the bucket.
  7. Pull the 220-micron bag up slowly and allow the water to drain out of the bag and into the bucket. Once the water has drained, give the bag a good squeeze to remove any remaining liquid still inside. Set the bag and buds aside for later. You’ll repeat this process in a bit.
  8. Take the second bucket and stack the bubble bags inside starting with the 20-micron, then the 73-micron and top off with the 160-micron bag.
  9. Pour the water from the agitator bucket into the strainer bucket. Once poured, give the inside of the agitator bucket a spray from the spray bottle or kitchen sprayer to release any trichomes stuck to the side and allow it to drain through the 160-micron bag for a minute or two.
  10. Carefully pull up the 160-micron bag a bit and spray the particulate toward the center of the screen. Then pull the bag up until it’s slightly across the top of the bucket and scrape the wet hash off with the metal spoon.
  11. Place on a 25-micron pressing screen to drain and dry.
  12. Repeat the lift, spray, lift, and scrape process for the remaining two bags. It’s a good idea to label the mounds of hash you have on your drying screens. They are of ascending quality as you descend in microns, so be sure to keep them separate
  13. Your first cycle is now complete. Now it’s time to head back up to step 1, re-secure the 220-micron bag to the agitator bucket, and do it all again. It is often the case that you can get a similar yield as your first round from your second, so be sure not to skip the repeat
  14. Once your second time around is done, use the spoon, plastic card, or knife to chop up the hash into tiny bits to dry. Give it about 30 minutes and chop it again. Then chop again. You want to create as much surface area as you can. Clumping is bad, and mould growth is devastating, so make sure it dries completely
  15. Once it’s finely chopped, let it sit in a low-moisture environment. It should be ready to enjoy in a day or two. 

As I mentioned above, if you choose to spring for a portable washing machine for the agitation process, simply secure your cannabis in a sealable 220-micron bag with half your ice and place it in the machine. Add the rest of the ice to the drum and top off with water to the level indicated on the inside of the washer. Run for 12 minutes, let it rest for 10 minutes, and then continue from step 8.

Mechanical Drum Separation

Mechanical Drum Separation

This method is the easiest as far as manual labour is concerned but is also by far the most cost-prohibitive. Generally used by professionals in the dispensary and smart-shop industry, it involves the purchase of a mechanical pollinator drum, which is a closed, horizontally-mounted silkscreen drum attached to a motor. The motor spins the drum much like a clothes dryer and, as the cannabis flower tumbles, it releases the trichomes that fall through the mesh and are collected in a compartment in the bottom.

The only downside comes when you talk about the price of the actual implement. Pollen separators can run in the neighbourhood of $600 to well over $1,000. But as they are usually listed with drum sizes that can handle 500 g at a time you may be able to recoup the initial monetary loss in no time.

What you’ll need:

  • Flower cannabis (again preferably frozen overnight)
  • Pollen tumbler, pollinator, or hash drum

Steps:

  1. Open the silkscreen tumbler drum.
  2. Throw the cannabis flower inside.
  3. Close and flip the switch.

That’s pretty much it! For about 15 – 20 minutes, the machine agitates the buds by tumbling them against the silkscreen, dry-sifting the kief from the plant matter and depositing it in a receptacle below. All you have to do now is to remove the hash and press it into bricks. No water, no ice, no harsh solvents, no dirty hands, no drying, and no messy clean-up.

Closing Thoughts

Centuries of cultivation and use have solidified hashish’s place in cannabis culture. From the most basic and historical hand-rolling to high-tech sieves, screens, and mechanical drums, hash can be easily made from the comfort of your own home as countless people have done in years past.  

If you’re making hash for the first time, you can try a simple method or one of the more complex methods, whichever works best for you. 

3 Easy Ways to Make Magic Mushroom Chocolate

Magic mushrooms may be part of a new conversation for many of us. Psychoactive mushrooms, or magic mushrooms, have largely been illegal in most countries since the UN voted to change their drug designation in 1971. 

But, instead of putting mushrooms on the list of banned substances, the committee only ended up putting the psychoactive ingredient in mushrooms in that category. The psychoactive ingredient is called psilocybin, which becomes psilocin when consumed and absorbed by the body. Thanks to that small oversight, many countries have now figured out ways to legally relax the regulations surrounding magic mushrooms, starting with decriminalization. That means even though a substance is illegal, law enforcement treats these offenses as low priority.

Magic mushrooms have also become the focus of dozens of studies around the world, as researchers work to determine what medicinal benefits they may offer. Studies have shown magic mushrooms can have hallucinogenic effects, changing your visual perception and altering how sounds are perceived. 

As the products become more prominent across Canada, the demand for new products grows. Just as we saw with cannabis and the rapid growth of edibles, magic mushrooms seem to be traveling down a similar path. Some dispensaries and mail-order services across the country now offer a wide variety of magic mushroom edibles including chocolates and gummies.

The great thing about magic mushrooms is their versatility, and it’s common to see people infuse all types of foods with this psychedelic fungi. Magic mushroom chocolate is among the most popular treats available at dispensaries, but this sweet snack is simple to make right in your own home. 

If this is your first time cooking with magic mushrooms, you’ll be happy to know that dosing is pretty straightforward and simple. A standard dose of magic mushrooms is between .5 grams and 3 grams of the dried product. 

Quick and Simple Magic Mushroom Chocolate

Quick and Simple Magic Mushroom Chocolate

If you’re looking for a quick and simple magic mushroom chocolate recipe, look no further. This recipe only requires a few ingredients and items you probably already have in your kitchen. 

Ingredients and Supplies

  • Dried magic mushrooms, ground (1-3 grams)
  • Chocolate bar or chocolate chips (one bar or half a bag of chocolate chips)
  • Glass bowl
  • Candy or chocolate moulds

Start with your desired amount of dried mushrooms and grind them up. If you’re a beginner in the world of psychedelics, you may want to use 1 to 2 grams of dried mushrooms for this recipe. You can also start with a microdose, which is usually around .5 grams. If you have a little more experience with these, you can up that dose to around 3 grams. 

If you’re using a bar of chocolate, break it up into small, even pieces and put them in a glass bowl. If you’re using chocolate chips instead, pour about half the bag in the bowl. You can use a double boiler (if you’re fancy), or you can just put the bowl in the microwave and melt the chocolate that way. You’ll need to nuke it on high for about 30 seconds, then stir it up and put it back in the microwave for another 20 seconds and check it again. Chocolate will turn crispy quickly if it gets too hot too fast, so take it slowly during this step. 

Once the chocolate is completely melted, add your dried, ground-up mushrooms and mix. As the chocolate starts to cool down, it will start to solidify. You have to make sure it’s mixed well before it cools off too much. Evenly pour the chocolate mixture into the molds and place them in the fridge. It will take about an hour to cool thoroughly, so try not to be too tempted to touch them while they set. 

Magic Mushroom Hot Cocoa

There’s nothing better than a warm cup of hot cocoa on a chilly autumn or winter night. You can make this mix and use it right away, or you can save it for another time. This is a homemade version of the powdered hot chocolate mix you find at the store. 

Ingredients and Supplies

  • Dried magic mushrooms (1-3 grams)
  • 1 ⅓ cups of granulated sugar
  • ⅔ cup of unsweetened cocoa 
  • ½ cup of powdered milk
  • ⅛ teaspoon salt
  • Ball jar or sealed container

First, make sure your dried mushrooms are ground up well. Place all of the ingredients, including the mushrooms, in a bowl and mix well. Once the ingredients are blended well, transfer the powdered mix into a ball jar or container with an air-tight seal or lid. 

When you’re ready to drink it, combine one to two tablespoons of the hot chocolate mix to one cup of hot water or milk and enjoy. You can hang on to this hot cocoa mix for up to six months before it’s time to make a new batch. 

Magic Mushroom Chocolate From Scratch

Magic Mushroom Chocolate From Scratch

If you want to try your hand at homemade psychedelic chocolate, this recipe is relatively easy to follow and doesn’t require an immense amount of time or crazy ingredients.

Ingredients and Supplies

  • 1-3 grams of dried magic mushrooms
  • 1½ heaping cups of cocoa 
  • ⅔ cups or 6 tablespoons of butter
  • ⅓ cup of granulated sugar
  • ¼ cup of powdered sugar
  • ⅓ cup of milk
  • ½ cup of water
  • 1 teaspoon of salt
  • Mixing bowl
  • Saucepan
  • Sieve or strainer

Pour the water into the saucepan and bring it to a simmer. In your mixing bowl, combine the butter and cocoa until it forms a paste, then add that mixture to the water. Let the mixture simmer for two minutes, then transfer it back to the mixing bowl. 

In a separate bowl, combine the salt and sugar, running it through a sieve to avoid getting clumps. Add the sugar and salt mix to the bowl with the cocoa and stir while slowly adding the milk. The last step is to add your mushrooms and mix until it’s evenly distributed throughout the chocolate. You can use chocolate or candy moulds, just like the first recipe. Let them cool in the refrigerator for about one hour before eating. 

Closing Thoughts

Whether you’re just learning about the world of magic mushrooms or you’ve used them dozens of times before, the key is to always start with a low dose and take it slowly. It can take anywhere from 20 minutes to more than an hour to begin feeling the effects, and you may not get the full effect until three hours after consuming your edibles. So, try a little at first, and you can always add more to reach your desired effect. 

The Best, Quick and Easy Pot Brownie Recipes

Creating the perfect cannabis brownie for recreational or medicinal uses is both easy and quick. You should begin with the best ingredients that you can find to get the best results. That includes using the right kind of marijuana, so you get the results you want, as well as the taste you love. 

What Do You Need to Make Brownies?

When it comes to making your own pot brownies, it is not really that much different than if you were to make other kinds of brownies. You will need a whisk, mixing bowl, and either butter or cooking spray to grease the pan. You will also need a saucepan, cooling rack, oven, and metal skewer for testing the brownies.

Pot vs. Regular Brownies

The thing that makes regular and pot brownies different is that you often add one of the following ingredients to pot brownies:

  • Cannabutter or Oil
  • Decarboxylated Cannabis
  • Hashish 

Without including one of these items, the brownies will not make you feel high or give you an enjoyable experience. 

Do You Need to Use Cannabutter

Do You Need to Use Cannabutter?

You do not have to use cannabutter, but you might find that it offers you better results. That might include a nicer flavour and a better potency and texture. If you want to start cooking the brownies without needing to infuse the butter, or you want a bit of an extra kick, you can add around four grams of either decarboxylated cannabis or hash to your recipe. 

When you are adding these ingredients, you can increase the amount of THC or CBD in it. It can change the flavour of the resulting brownies a bit. You might need to add a bit less flower or add some more water or hemp milk. That will allow you to maintain the right balance of texture and moisture to keep the brownies together. 

Of course, it is ultimately up to you about how much cannabis you want to add, so you might decide to do a bit of experimentation. That will allow you to find the right mixture. It can be subjective about what helps you create the best brownies. For example, do you like fudgy, dense brownies, or do you want them to be crumblier? Perhaps you like to add nuts to add a bit of extra crunch to them. 

The best and easiest recipe is one that is easy to tailor to your desires. For example, do you want to add some more chocolate to them? Perhaps you would like to add nuts and fruits to them before baking. Some people like their brownies straight, while others prefer a rich, creamy coating on them. 

This recipe is easy to either enjoy as it is written, or you can add some extra ingredients. You might also decide to substitute a couple of the ingredients for others. For example, if you are trying to eat better, you might want to use applesauce to replace some of the sugar and eggs. Or you might use rice or almond flour instead of some of the wheat flour. You might choose to use coconut oil or vegetable shortening instead of the butter. 

Making the Brownies

First, you will need to collect the ingredients. These include:

  • 115 Grams of Cannabutter
  • 75 Grams of Cocoa Powder
  • 2 Large Eggs
  • 1.5 Grams of Salt
  • 225 Grams of Sugar
  • 4.5 Grams of Vanilla Extract
  • 2.5 Grams of Baking Powder
  • 96 Grams of Flour 

You can also add some optional ingredients to the mixture. Not everyone likes the somewhat grassy taste of marijuana. If you find that you do not like the taste of cannabis, depending on the strain, you might want to add some extra ingredients. These might include:

  • A Few Finely Chopped Fresh Mint Leaves
  • 115 Grams of Dried Fruit, such as Cranberries or Raisins
  • 227 Grams of Chocolate Chips
  • 65 Grams of Chopped Almonds or Walnuts
  • 198 Grams of Chopped Dark Chocolate Pieces (go with 60 to 70 percent cacao)
Making the Brownies

Making the Brownies

Remember that the kind of oven you are working with will determine the baking time for the brownies. Some ovens might cook hotter than others, even if you set them to the correct temperature. Others might cook more evenly than others. You will have to adjust the baking time to suit the oven. It is always better to make them a little underdone than to bake them for too long since you can always put them back in the oven for a bit. 

Preheat the oven to around 180 degrees Celsius. Line your brownie pan with some parchment paper or use cooking spray or butter to grease it. 

Turn the stove to medium heat and put the cannabutter in your saucepan to melt it. As it starts to melt, add your cocoa powder, and keep stirring in until the butter is completely melted and blended in with the cocoa powder. Just do not let it come to a boil since you do not want to burn off the cannabinoids in the butter. If you are adding your decarbed cannabis instead of using cannabutter, now is the time to add it. If you are using mint leaves or solid pieces of chocolate, this is also the time to add them. 

You might want to add only about a third of the chocolate to the butter since you might want to leave the rest, so the brownies have some more texture to them. Once everything is blended together and the butter is all melted, you can set aside your pan to cool for a couple of minutes.

Now, it is time to add the other ingredients. Add the salt and vanilla extract to your saucepan and mix until it has dissolved. Now, beat in each egg until you have a glossy mixture. Fold in the baking powder and flour. Then, stir it for at least a few more minutes. 

If you have other optional ingredients, such as nuts, chocolate pieces, or fruits, you can fold them into the mixture. Try to spread them in evenly, so each brownie piece will have an even amount of them in it. 

Once the oven is completely preheated, transfer your batter to the lined or greased cake pan and spread your mixture evenly. Place the pan in the middle of your oven and bake it for around 25 to 30 minutes. Make sure that you do not bake the brownies for too long. 

You can test the doneness of the brownies if you stick a metal skewer in the pan’s center. You can then see if there is raw batter on it. If there is no batter on it, you can take the pan out of the oven and let it begin to cool on your metal cooling rack. 

Finishing the Brownies

If you want to add any toppings or frosting, you can then do that once they are cool. If you want to add any topping or frosting to the brownies, it can be easier to do that before you start to cut them up. Don’t forget to carefully portion the brownies out since you do not want to take too many and get too high. 

You might want to go with a THC– or CBD-infused topping, which can add a little extra to the treat. You can also sprinkle some powdered sugar on the top of the brownies. If you want to cut the brownies up perfectly evenly, you might want to use an accordion or expandable cutter. They can narrow or widen the area between the wheels, so you can decide how large to make the servings.

Storing the Brownies

Storing the Brownies 

After you have added any more toppings and then cut the brownies to the right size, you will need to store them correctly. If you do not keep the air out, they might go stale. Plus, if you live with others, you will not want someone else to come and eat them if they are left in the open. 

To help you keep the brownies away from children, you can keep them in a container that seals out the air. That will also help them stay fresh longer. Place some parchment paper between the layers of brownies if you do not want them to stick together.

If you are concerned that you will eat too many of the edibles, you might want to make a second batch that doesn’t have any THC or CBD in them. That way, if you want to keep eating the brownies, you can do so without getting too high.

Making Cannabis Frosting 

You might decide that you want to top your brownies with a bit of extra cannabis. The recipe is very simple and takes less time to make than the brownies do. It is fairly strong, depending on the strength of your cannabutter, so you might want to either mix it with normal butter or use some coconut oil instead of butter unless you are planning on having very small servings. You will need:

  • 344 Grams of Powdered Sugar
  • 76 Grams of Cocoa Powder
  • 76 Grams of Marijuana Butter
  • 63 Grams of Evaporated Milk
  • 4.2 Grams of Vanilla Extract 

First, sift your cocoa powder and powdered sugar together. Whip together your butter until it has reduced a smooth consistency and mix the cocoa powder and sugar together with the evaporated milk. Add the vanilla, as well.

To get the right consistency, you will need to have an electric mixer. You can submerge the device’s mixers fully before you turn it on. If you do not, then you might end up making a mess as you get the frosting splattered around your kitchen. 

Keep the mixer on a low or medium speed until the frosting has reached the right consistency and smoothness. Depending on what you prefer, you can add a bit of extra sugar to thicken your frosting and some more milk to make it a bit thinner. If you want the consistency to be even better, you can add in some chocolate frosting from the store, as well. 

Add a generous amount of frosting to your cooled brownies. Or you can eat the frosting straight from the bowl if you want to get started on getting high. The nice thing about toppings is that you can use as much or as little as you want. 

Using the Frosting

Using the Frosting 

Your body will likely react differently to a cannabis edible than someone else’s might, and it might even differ for you depending on the day. It can depend on what you have eaten already and how much sleep you have gotten. The place you are when the edibles affect you can also play a role. 

You can adjust the dose of the frosting depending on whether you want to get very high from the brownies and frosting together or if you just want a little hit. The tolerance of your body to cannabis and the desired medicinal or psychoactive effects can play a role in how much you decide to have, as well. 

You might decide to change up the recipe a bit by adding some shredded coconut if you like the two flavours together. Or you can put some edible glitter or sprinkles on the finished product to make it look extra special. You can also place solid toppings on your frosting after you have put it on your dessert.

You will want to add any toppings to your frosting as soon as you have put it on since the frosting will get harder after a while. Butter can be sensitive to the temperature, so you can change its consistency a bit by either cooling or heating your frosting. 

Closing Thoughts 

Brownies are perhaps one of the most popular and delicious ways of consuming cannabis. You might have your own family recipe to create the fun treats. If you do, it is easy to use your own cannabutter for that one. Even if you are using a family recipe, experimentation with different ingredients and toppings can help you create the best brownies for you

Strain Review: Northern Lights

If your body and mind are overworked and need to have some relaxation, the Northern Lights strain is perfect for you. It is perfect for relaxing at night since it makes you feel both sedated and uplifted. The strain can offer a nearly hallucinogenic effect, and you might feel like the Northern Lights were brought to your home. 

The Basics of the Strain

If you ever see the real Northern Lights, they may be overwhelming to you. They can make you feel peaceful and calm, and the same is true of using the Northern Lights strain. It offers an experience that is out of the world. Thankfully, you can find it at many dispensaries today. 

The Northern Lights strain is one of the most common indica strains. Some medical marijuana patients use this strain. Also, if you want to wind down before bed, smoking this strain might be a good option for you. 

It is not certain where the Northern Lights strain came from. Some people believe that it was first grown in Seattle, but others believe that it was first grown in Holland and was made after 1985. No matter where the strain came from, its lineage means that it offers a full-body high that makes you feel very happy. 

It was created by combining a Thai sativa and an Afghani indica, and it has around 90 percent indica and 10 percent sativa. It is not likely to leave you feeling very focused or energized. The THC in this strain can range from 15 to 22 percent, and you will get a pleasant high. You will likely feel the effects after only a couple of hits. 

There are several phenotypes of the Northern Lights strain, and many medical cannabis users choose to use them. You can find Northern Lights in many dispensaries that focus on medical marijuana users. However, both recreational and medical users can get it easily. 

The Basics of the Strain

Appearance, Flavour, and Aroma

When you think of the real Northern Lights, you might think of a frozen tundra or a fantasy world. It might seem fitting then that the strain’s smell is piney and woodsy and reminds users of adventure in the woods. The scent can hit your nose immediately and is pungent. No matter what room you are in, you will likely fill it with the smell of the strain. However, the flavour can hit different notes, so there can be some variety.

When you first taste it, you will likely note the earthy, piney flavour. But it will soon become more dynamic than that. The flavour is often sweet, reminding users of candy. That gives it a great combination for a late-night smoke. Sometimes, you might also taste notes of citrus, which can make the flavour profile even more robust.

The buds of this strain are packed densely and have prominent, thick sugar leaves, which stick out a bit. The buds are olive green and might have some blue and purple going through them. That often looks similar to the colours in the real Northern Lights. 

The pistils of the plant can blend with the sugar leaves effortlessly. They have a deep orange, yet brassy appearance. The plant’s water leaves might be in a deep shade of green and show deep blue on their tips. 

Growing the Strain 

Another one of the benefits of the Northern Lights strain is that growing it is very easy. It resists pests, diseases, mould, and mildew very well. Plus, whether you are growing it inside or out, it is simple to grow. It is only a medium-size plant. 

These factors combined show that it is one of the best marijuana strains for growers, particularly for new cultivators. When you grow it outside, you need to have the right growing conditions. You would ideally use a warm, Mediterranean environment, similar to that of Northern Africa or California.

But you can also grow it inside if you regulate the temperature. You can use either traditional soil or hydroponics. There is a short flowering period of only seven to nine weeks, which is not as long as many other strains. You will get the delicious marijuana sooner than other types. 

When you grow it outside during a regular growing season, you can harvest it in the middle of October, and the yields will be about 623 grams for each plant. You won’t harvest quite as much if you grow it inside.

But no matter what growing method you choose, the Northern Lights strain can offer a positive growing experience since the plant resists diseases, does not have a long flowering period, and has a good yield to it. When these factors are combined, the strain is a simple one for growing.

Growing the Strain

The Effects of the Strain 

When you use Northern Lights, the strain might have euphoric, dreamy effects. It often causes users to feel more blissful and stay in an altered reality. They can be lazy physically and stay peaceful. Because of the full-bodied effects, instead of using this strain in the daytime, you should use it once the sun has gone down, so you can truly enjoy the strain. You might feel happy, and some users find that they notice psychoactive effects that place a pleasant glow on things, causing the world to look more vibrant.

When you are using Northern Lights strain, you might feel introspective or want to create something. But after a while, the effects will turn into exhaustion, causing you to feel sedated. After having a long night of this happiness, you might feel refreshed the next morning, when you are livelier. There are no “hangovers” after using the strain. 

Closing Thoughts 

Hopefully, you have learned a bit more about the Northern Lights strain and are ready to try it for yourself. Using a true indica can give you a great experience, and it can take both your body and mind to a better place. Whether you have ever seen the Northern Lights, using the Northern Lights strain can be just as fun. 

The Pros and Cons of Disposable Cannabis Vape Pens

The Pros and Cons Consuming cannabis are more immersive than ever before with more and more choices being introduced into the marketplace. Some partakers prefer the classic, strong smell of flower, while others might prefer to smoke more discreetly. Smoking a vape pen can be a good alternative for any user and appear attractive due to its flashy appearance and overall ease of usage. 

Vaping cannabis might have seemed like a bit of a novelty or a luxury at first, but it is now more socially acceptable, leading to an increase in demand for new products. Disposable cannabis vape pens have not only skyrocketed in popularity in Canada since their introduction nearly a decade ago, but their impact on a global scale is significant, as well. When deciding whether to use disposable vape pens, there are both pros and cons.

The Pros of Disposable Vape Pens

The word disposable is very attractive to hear when considering a way to inhale cannabis. For any new marijuana connoisseur or virgin vaper, buying an actual vape device and potentiality a whole kit can be a stressful and confusing task. Purchasing a disposable pen is an easier alternative, as the commitment of sticking with your initial device is no longer a factor. It is a smart option when considering whether to dabble or switch to cannabis vaping.

Rather than purchasing a vape kit and keeping up with its maintenance, purchasing a disposable vape allows you to not have to worry about the longevity of the device. You also do not have to spend a considerable amount of money on the actual kit. This is particularly useful for new cannabis vapers. 

When considering a disposable pen, ask your budtender at your local dispensary what they recommend for a more novice toke or the one disposable that will have you forget texting back is something people like. Not to mention, a disposable kit doesn’t need to be charged, so it won’t die on you as the beat is about to drop at your virtual live concert show. 

Smoking a disposable vape pen is referred to as the “easier way” to smoke oil due to the fact that that standard equipment for this type of concentrate is not relevant. Typically, in order to smoke an oil-based cannabis product, a torch and rig setup would be needed. This not only can be very costly but also is not a realistic way to smoke oil while on the go. Using a disposable cannabis vape pen will result in the same joy that is experienced after taking a hit from a rig without the extra components. 

Another reason why disposable vape pens can be a pro is that they tend to be smaller than a device you would purchase at your dispensary. Simplicity is a key detail in many disposable vape pens. The amount of oil smoked is displayed and often, giving you a constant, consistent amount of vaporized marijuana oil. Ultimately, disposables are typically easier to use, more compact in size, and a streamlined option for smoking cannabis oil.

The Cons of Disposable Cannabis Vape Pens

The Cons of Disposable Cannabis Vape Pens

When considering purchasing either a disposable vape pen or a reusable device, it is smart to consider the environmental factor. Disposable pens often contain glass and oil residue, which is extremely difficult to recycle. All multi-material contraptions containing glass will come to their life’s end at a landfill, furthering the environmental impact. The oil residue found in disposable vape pens will also end up at a landfill due to the contents of the oil. Returning the finished pens to a dispensary is not an option either due to government regulations. 

In most cases, almost all cannabis vape cartridges and disposable pens are going to contain the same types of materials, so until a more prominent solution is found to deal with such components, purchasing the vape pen you need based on the situation you are in is going to be the easiest option.

Although disposable vapes are typically cheaper and more convenient, lower-quality disposable pens can pose a health risk due to the way the heating elements are manufactured in these vapes. Due to the potential of poorly made heating properties, over- and underheating are risk factors to consider. Overheating of the pen can result in a release of toxic chemicals into your lungs. Underheating, on the other hand, can cause serious lung and health problems since the cannabis oil is not vaporized properly, exposing yourself to underheated oils. However, this isn’t an issue with higher-quality disposable pens.

Some disposable marijuana vape pens are also notorious for the cheap materials found in the actual battery. The pen can “die” before all the oil has been smoked, leaving you with a sense of helplessness as you hold the once smokable pen in its flaccid and useless form. Batteries in poor-quality disposable vapes also can corrode and can lead to an explosion of the pen without any prior warning. Again, this isn’t a concern with higher-quality disposable vape pens from a reputable manufacturer.

Disposable vs. Non-Disposable Cannabis Vape Pens

Disposable vs. Non-Disposable Cannabis Vape Pens

In conclusion, buying and smoking a disposable vape pen can be the breeziest and craftiest option, but the impact on the earth’s wellbeing should be considered, as well. While new cannabis users might be more easily attracted to a disposable vape pen, most veteran smokers will likely have an already preferred kit. 

If you are visiting a country that has legalized marijuana, it might make more sense to purchase a disposable cannabis vape pen once at your destination to avoid the potential entanglement you might be met with at the airport. It should also be considered that a disposable pen in most cases cannot leave the country it was purchased in. Only buy what you can finish while vacationing or visiting. Ask your dispensary’s budtender how much they suggest you purchase depending on the time you will spend abroad. 

How to Make Cannabis Capsules with CBD or Whole Plant Extract

If you want to take advantage of an efficient and effective method of dosing your cannabis orally, then capsules might be a good option for you. This is a perfect method for users who want to avoid unwanted calories and extra ingredients. Sometimes, capsules are known as canna caps, and they are one of the more popular methods of using CBD. Many people consider them to be both effective and safe. You can measure your dose with ease, and your body can easily metabolize the capsules. You can find marijuana capsules in many dispensaries, but depending on where you get them, they can vary in their ingredients and potency.

About CBD Capsules 

Making capsules infused with CBD at home is a fun project to take on, and the process is relatively simple and inexpensive. The materials can be obtained at health food stores or online. It only takes a few hours to make your capsules, and you can do it with several different methods depending on the equipment and ingredients you have on hand. 

One way of making these capsules is by using soy lecithin and coconut oil. When combined, these ingredients can help your body better metabolize the cannabinoids as they move through your digestive system. That way, you can get more for your money.

Why Choose Capsules

Why Choose Capsules?

Currently, you can find many edibles when it comes to oral forms of CBD. That means that you can find a range of food items, such as chocolates and candies. Of course, having a treat every now and then is fine, too. Many people are in the habit of mixing marijuana and food. However, most people do not need to have an extra brownie or more in their diet each day. 

Many patients who use CBD also have chronic health issues, such as diabetes, and having extra sugar is not a good idea. To avoid these issues, CBD capsules are a perfect solution. They allow you to avoid ingesting extra sugar, and they can even let you have a more precise dosage. They can be easier to use for many people. 

Sometimes, it can be expensive to purchase premade capsules at certain dispensaries. The good news is that making your own can be less expensive than purchasing the premade ones from your local store.

Another advantage of using capsules is that capsules can be more concentrated. You can choose the dosage for each capsule, and depending on your reasons for using capsules, you might choose to make stronger or weaker ones. For instance, some people use the capsules to try to help with sleep disorders, seizures, cancer, depression, pain, or inflammation. 

For medical users, staying in control of the dosage is vital, and this is why so many people depend on capsules to take their marijuana. It is often harder to determine the size of the dosage when vaping or smoking. It is not always entirely clear how much has been taken after each hit. Plus, when you smoke cannabis, the terpenes often are burned off, and many people believe that the terpenes offer some advantages. You can get a more consistent and potent dosage when you use pills. 

Sometimes, smoking marijuana can cause lung irritation, wheezing, or coughing. Excess mucous might be produced, as well. Often, the air is too hot, which is what can cause this issue. Some people believe that combusting marijuana can cause potentially carcinogenic components to be produced. But with cannabis capsules, your digestive system will process the cannabinoids instead of your lungs. That will reduce any potential risk that might come from inhaling the burnt material. 

Uses of Coconut Oil and Cannabis

The dosing of your capsules will depend on many different factors, including how potent the materials are in the beginning and the ingredients that you use. There is no one perfect ratio of ingredients, but there are some good starting points, and then you can experiment from there to determine the best dose for you. If you want to know the true potency of the capsule, you would have to send them off to a lab for testing. If this is an option for you and you are serious about making your own capsules, don’t be afraid to go with this method. 

Making Your Capsules

Making Your Capsules

To begin with, you will need some ingredients. This includes:

  • 7 to 14 grams of a cannabis strain high in CBD — ground bud is often the best option
  • 7 to 8 grams of soy lecithin 
  • 109 grams of coconut oil
  • Slow cooker or oven
  • Several dozen gelatin capsules
  • Capsule filling machine
  • Cooking pot and lid
  • Cheesecloth
  • Syringe
  • Baking tray
  • Glass bowl
  • Parchment paper
  • Small bowl
  • Rubber band
  • Spatula

Decarboxylating the Cannabis

First, you will decarb your cannabis. You will preheat the oven to about 115 degrees Celsius. Next, you will grind the cannabis with a grinder and spread it across some parchment paper on your baking tray. The oven’s temperature might fluctuate a bit, so you should not set the oven any hotter than 120 degrees. If it is hotter, then you might begin to cook off the cannabinoids. 

You will bake the cannabis for around 30 to 45 minutes to ensure that it is decarboxylated right. Once it is done, you can take it out of the oven. If you will be using an oven instead of a slow cooker to infuse the oil, you can leave the temperature on at around 115 degrees. 

Infusing the Oil with an Oven

First, you will begin by filling the pot around three-quarters of the way with water. Bring it to a low boil. Now add in the soy lecithin and the coconut oil to a glass bowl and put this in the pot. It should sit a couple of inches above the water. This will produce just enough heat to begin to melt down the soy lecithin and the coconut oil, and then you can add in the ground marijuana.

Mix this together until it is blended well. Now, empty the hot water and put the oil mixture in the pot. Then, put your pot in the oven for around 30 to 45 minutes. Check on it every once in a while and mix it a bit. You can cook it longer if you like, but remember that heat can affect the potency of the CBD and make it less effective.

Infusing the Oil with a Slow Cooker

If you want to use a slow cooker instead of your oven, add the decarboxylated material, soy lecithin, and coconut oil to your slow cooker and turn it on to the lowest setting. Allow it to cook for around two hours or longer if you want. This will ensure that it is decarboxylated properly. Stir it several times each hour. Make sure that you check what temperature the cooker works at beforehand, so you can know how much time you might need. 

Filling the Capsules

Filling the Capsules

While you are waiting for the oil mixture to infuse in your slow cooker or oven, prepare your gelatin capsules, as well as the capsule filling machine, if you are using one. Follow the package’s instructions when doing this. Using a capsule filling machine can make the process a lot easier and faster, but it is not required. You can use a pen to poke some holes into a box to hold your capsules as you are filling them instead. But many people who want to make their own capsules find that a machine is worthwhile. 

Now, take the cheesecloth and place it over the rim of the bowl with a rubber band. When the oil mixture is done, take it out of the oven or slow cooker and strain it through the cheesecloth and in the bowl. You can catch the unnecessary bits along the way. Once you are done, allow the oil to cool to a comfortable temperature, so you do not burn yourself. If it is too hot, you might cause the gelatin capsules to melt, as well, so check instructions on the package to see if this is the case. Let the oil cool as much as you can without letting it become solid. 

Once the oil is cool enough, fill your syringe. Follow the instructions on the packaging of the syringe beforehand since each one can work differently. Ensure that the oil is still warm enough that it is a liquid. Use the tapered tip on the syringe to place some oil in each of the capsules. 

Once you are done, look at the instructions of the filling machine on how to close each of your capsules. You might find that a couple of capsules are a little too full, so you can use some paper towels to wipe off any of the residue. 

You can store your capsules in a dark, cool place, such as the fridge, until it is time to use them. If you do them correctly, then the recipe can make as much as 45 to 50 capsules, depending on how much cannabis and oil were used to begin with. 

Other Variations

The effects of these capsules will depend a lot on the type of cannabis that you use during the extraction process. The more cannabinoids are in the material, the more potent your capsules will be. To increase the level of potency, you can infuse the coconut oil with marijuana resin that has gone through extraction as well. That might include one of the many solventless extracts you can find, such as rosin, or hash. You can also use BHO, but many people prefer to use a resin that has not been extracted using solvents. They believe that these resins are more natural. 

But if you choose to use a whole plant extract, remember that they are much more potent, and you should be careful. Depending on how high your tolerance is, you might choose to make the ratio higher or lower based on what you put in the capsule. 

You can also add some other ingredients to the capsules if you want to change them up a bit. For instance, some people like to add powdered cumin or a bit of black pepper to their capsules, as well. They believe that these ingredients might have potential anti-inflammatory effects and might increase the effects of the CBD in the capsules. 

Other Variations

Dosing Your Capsules

There are a few different variables that can affect your dosage. This includes the ratio of CBD material to oil, the potency of the cannabis strain, and how decarbed it was. The best way to determine how strong the capsules are is to take them off to a lab to be tested.

However, this can be expensive, and you might only need to have a rough estimate of the strength of the capsules. If that is the case, then you can take the starting strain’s potency and covert it to milligrams.

Then, you can divide this number by the weight of the final yield and subtract about 10 percent to consider decarboxylation. This will give you an estimate of the potency of the entire batch. Then, you can divide this number by the number of capsules that you filled, which will give you an estimate of the potency of each of your capsules.

Remember that when you use an oral form of CBD, the effects will appear around 45 to 60 minutes after ingestion. Your digestive system needs time to absorb the cannabinoids, then they must enter the bloodstream. It is important to take just one capsule to begin with and wait an hour or two until taking the next one. Then, you can find the right dose for you. 

Closing Thoughts

Making your own CBD capsules at home is a fun and easy way of customizing your cannabis intake. They are easy to dose each morning and offer a discreet method of using CBD during the day. You also can experiment to find the right dosage for you.

What Are Terpenes in Marijuana?

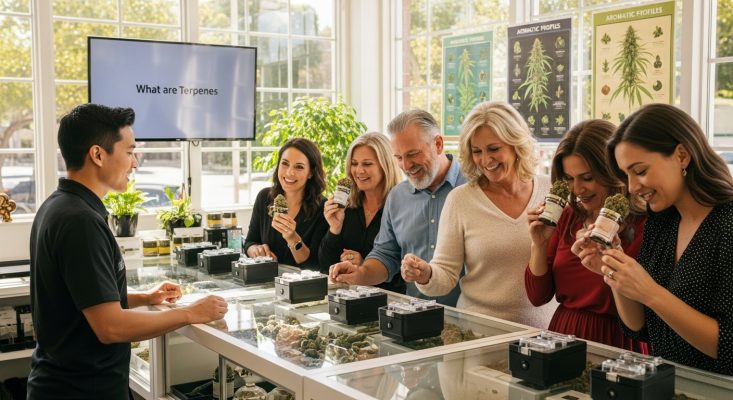
Most cannabis users know that there are no two identical marijuana strains. From citrus smells to earthy aromas, the many flavours of marijuana can add to your experience. But you might be wondering what causes the differences in the aromas and tastes in different strains. The terpenes are the answer. 

About Terpenes

The terpenes are oils that the glands of the plant secrete. More than 100 terpenes have been identified, and each one has its own smell, effects, and flavour. For instance, the terpenes are what give Pineapple Twist its fruity, sweet taste and Sour Diesel its skunky smell. 

The terpenes are a great part of the marijuana plant, but they are not just found in cannabis. You can find them in every plant, which is why each aroma and flavour of the terpenes are named after plants. For instance, breeders have integrated the terpenes that give cherries their smell with cannabis to create Cherry OG. Plus, combining the terpenes can create unique tastes and smells, such as diesel and skunk. 

About the Chemistry

The word terpene refers to many different chemical components that can affect the smell and taste of plants, including vegetables and fruits. You can also divide terpenes into types.

Examples of monoterpenes include terpinolene, limonene, and myrcene. These are considered to be light terpenes, which can give you floral scents, such as rose, kiwi, or apple. 

On the other hand, sesquiterpenes are considered to be heavier. They can give you stronger scents, such as musk, diesel fuel, or tea tree. Examples of these terpenes include humulene and caryophyllene.

Monoterpenes can evaporate faster once the plant has been cut down. For instance, after decarboxylation and dry curing, there might be around 55 to 85 percent less monoterpenes. That means that the heavier sesquiterpenes, which remain in larger concentrations, will influence the aroma and scent more than the monoterpenes. This is why decarboxylated marijuana often tends to be more pungent since there are few, if any, monoterpenes remaining. 

Kinds of Terpenes

Kinds of Terpenes 

A common type of terpene is limonene, which offers a zesty, citrusy flavour. You can find it in tropical strains of cannabis, such as Jack Herer and Pineapple Express. Some people believe that these strains have potential depression-fighting effects. This is because of the high amount of limonene in them. 

Many medical cannabis users look for limonene. Some people use this terpene if they have cancer, want to try to lose weight, or have bronchitis. You can find limonene in many cannabis ointments and creams for the skin. 

Myrcene

If you have ever used a strain such as Blue Dream and fallen asleep right after, you might have experienced myrcene. Many people who have insomnia use it to try to alleviate their symptoms. Others believe that this terpene can have antiproliferative, antidiabetic, antibacterial, anti-inflammatory, and antispasmodic properties, as well.

Because it can make you feel more sedated, myrcene often is used by those who are in pain. You can find it in nature in sweet basil, mangos, thyme, bay, hops, and parsley. If you have heard about eating mangos to try to increase your high, it is because of this terpene found in the fruit.

Delta 3 Carene

Some people use this terpene for its potential anti-inflammatory effects. Many people also believe that it has soothing properties. If you have hurt yourself, then you can use this terpene to try to dry up bodily fluids. Even taking just one hit can affect you right away. You can find this terpene in many different strains of cannabis. Plus, you can also naturally find it in the rosemary herb. 

Preserving the Terpenes

To get the most benefits out of the terpenes, you should try to ensure that the flavour is fresh. One of the most important steps is to package your cannabis properly. There are a few best practices to follow.

Avoiding Plastic

Plastic, such as plastic sandwich bags, is one of the worst ways of preserving your weed. Unfortunately, too many marijuana users choose this method for storing weed. They do not keep out cold, moisture, heat, light, or air from the cannabis. Sealable ones don’t do much, either. 

Plastic is not good for keeping your cannabis fresh because it can have a static charge. This will pull the trichomes and terpenes from the plant matter to the plastic. That will create a fine powder that will be impossible to get from the bag to your joint.

It might seem convenient and quick to store cannabis in a plastic bag. However, it will not preserve the unique flavour profile or the effects that you want. 

Avoiding Plastic

Using Glass

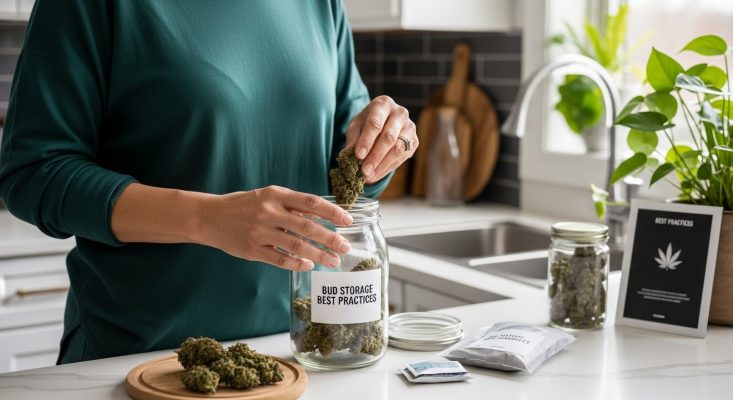
Glass is a much better option for storing your cannabis because it can keep the air out better. Plus, there are no potentially harmful chemical components that could attack the terpenes. When you visit a dispensary, you should bring your own glass jars, so your budtender can fill the instead of putting it in plastic bags. If you order cannabis online, you should put it in plastic bags immediately. 

Storage of Your Cannabis

You should keep your marijuana in a safe environment. If there is a lot of moisture, you might have mildew building up on the marijuana. If there is not enough moisture, however, your cannabis can dry out and will not taste very good. 

You should store your marijuana in jars in a cool and dark area to keep the terpenes in the right area. The containers should be mostly full since having extra space can allow mildew, humidity, or heat to enter the area. 

Closing Thoughts 

Knowing the right way to identify your terpenes, whether they are berry or forest-scented, you can become a more well-rounded cannabis connoisseur. If you grow your own at home, knowing more about terpenes can give you a bit more control over the way that your crop turns out. Plus, you will gain a deeper appreciation for what you are really inhaling when you smoke.

Cannabis and Cannabinoids: What You Need to Know

Cannabis and Cannabinoids – Today, more people are choosing to use cannabis, especially as it becomes legalized in more parts of the world. Even medical patients are using cannabis to try to help with certain health conditions. One of the most common cannabinoids is CBD.

About CBD

Many types of CBD products have a variety of cannabinoids, which are made in your brain and the cannabis plant. Products that have larger concentrations of CBD often only have a small amount of THC, which is a psychoactive substance.

More research is being done on CBD and other cannabinoids every day. The potential advantages are not yet studied enough, but some people choose to use CBD for such issues as:

Many CBD users believe that cannabinoids can help to relieve their anxiety, and some research suggests that this might be a credible idea. It might interact with your body’s serotonin receptors, which might decrease anxious feelings. Some people also use cannabis when they are going through chemotherapy. 

Even in areas where cannabis is not legal, some governments still allow patients to use it for medical purposes. In the United States, for instance, a couple of cannabis-based medications are legal at the federal level, and some individual states allow people to use cannabis medicinally. 

How Do Cannabinoids Work?

Cannabinoids can achieve many different effects since they can interact with your brain’s endocannabinoid system. More research is needed in this area because of legal restrictions in many countries. However, it is known that your brain produces at least two different types of cannabinoids. These are called endocannabinoids. 

Your brain is thought to use them to regulate different health aspects, such as appetite, mood, and memory. The cannabinoids can work in your brain by moving messages across your endocannabinoid system and bind to your receptors. That will signal the system to respond and trigger unknown actions. But it is believed that the goal is to maintain homeostasis, which is a sense of balance in your body. The system might act when an illness strikes, so your body can work properly again. 

Kinds of Cannabinoids

Kinds of Cannabinoids 

There are over a hundred known cannabinoids, and there are likely more in the plant. Many of the known cannabinoids are called phytocannabinoids, which you can find in cannabis and a wide variety of other plants. For example, cloves, ginseng, broccoli, carrots, and black pepper have phytocannabinoids in them, too. 

About Phytocannabinoids

There are at least 113 unique phytocannabinoids, and CBD and THC are the most common. Other examples include CBG, CBC, and CBN. 

Endocannabinoids

There are two main endocannabinoids that the brain produces. It is believed that anandamide can promote a reward response, and the endocannabinoid 2-AG can interact with the receptors in your endocannabinoid system. 

What Are the Known Cannabinoids?

Of the many cannabinoids out there, there are a few more important ones. 

Tetrahydrocannabinol (THC)

The cannabinoid THC is one of the most common components that you can find in the cannabis plant. Marijuana and hemp are both part of the cannabis family, but the hemp plant has very low amounts of THC. You might only see around 0.1 percent THC in hemp, but a marijuana plant could have as much as 40 percent THC. 

Cannabinol (CBN)

CBN is not made by the marijuana plant under the best circumstances. Instead, THC can transform into CBN when there is too much heat or light. Usually, only older plants have much CBN in them. 

Cannabidiol (CBD)

Cannabidiol is one of the most common cannabinoids, and this is what you can usually find when you are looking for natural cannabis products. 

Cannabichromene (CBC)

CBC is a highly concentrated cannabinoid. However, it has no psychoactive effects, just like CBD

Cannabigerol (CBG)

CBG is a progenitor of other cannabinoids. Initially, cannabis can produce CBG, which can then undergo biological processes that can convert it to other substances. Often, young marijuana plants are harvested to experiment with this substance.

2-Arachidonoylglycerol (2-AG)

This is another known endocannabinoid in your body. It is believed that this is the endocannabinoid that can play the main role in helping your endocannabinoid system function. 

Anandamide

This is a type of endocannabinoid, and you can think of it as being parallel to THC. It can have a strong impact on your emotional state, and it can even be related to the reward system in your brain. 

About Synthetic Cannabinoids

About Synthetic Cannabinoids 

As cannabis products become more commonly used, some companies are trying to develop synthetic cannabinoids. You might have heard it called “synthetic marijuana.” There might be some quality synthetic cannabinoids someday, but it is difficult or impossible to find them today. There may be some negative effects associated with synthetic marijuana. For instance, if you stop taking it, you might have withdrawal symptoms, like fatigue or headaches. This has not been documented with regular cannabis. 

Synthetic cannabis is created in a lab, and it works by binding to the same neuroreceptors as THC and CBD. It can produce similar effects to THC and CBD, and some people report feeling relaxed after using it. However, it can also cause negative symptoms. 

It is believed that synthetic cannabinoids can affect your brain more than cannabis, and the effects can be unpredictable. You might notice brain swelling, nausea, seizures, aggression, or hallucinations after using these types of cannabinoids. Many people have died after using fake THC or CBD products. It is best to stick with real cannabis to avoid these side effects. You can often get a better experience by using real marijuana products, as well.

About the Entourage Effect

Using several cannabinoids together can have a stronger effect than if you used each one separately. Some strains are grown to have higher ratios of certain cannabinoids to create a unique experience. For instance, CBD can reduce the effects of THC, and if you have a strain that has more CBD than THC, the psychoactive effects will be fairly minor. 

Closing Thoughts 

Today, scientists are making more discoveries about the potential advantages of cannabinoids. You never know what the next discovery will be, so keep an eye out.